
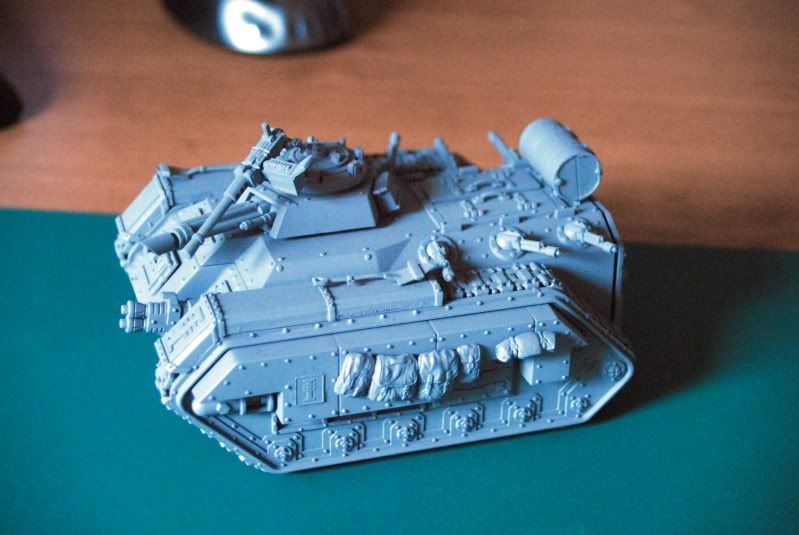
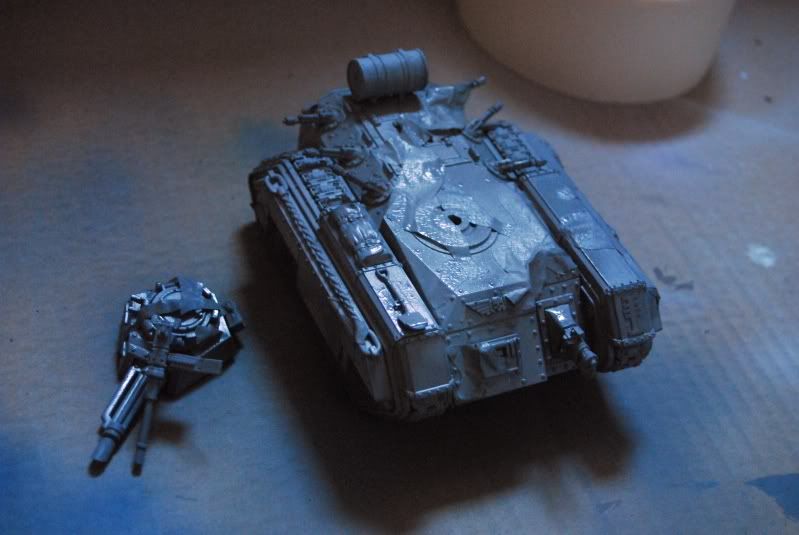
So here is the primed and ready to go Chim, I use Halfords grey primer, one because it's cheaper and b, because it has a lot of solvent, which means its good for resin and lubed greenstuff and well, anything really.
 The pictures arent up to my usuall standard, bacuse I was taking them on the fly (and doofus that I am I forgot to change thw white balance settings from my studio set up to "real world")
First thing to do for the urban camo I've attempted on this model is to airbrush the whole model white.

I use a simple compressor and have two different airburshes, one i use more like a spray gun, the other for more detail and freehand, pots of paint, water, kitchen roll and an old litter tray to keep my tidy form the bulk of my kit for this kind of thing.
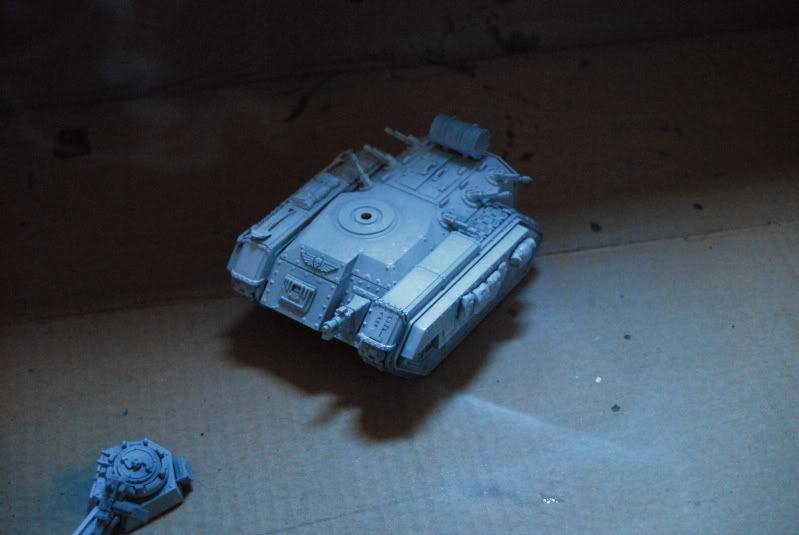
so here's the white model. not very clean, my white is about eight years old and is really too thick for airbrushing now, so that's on the shopping list.
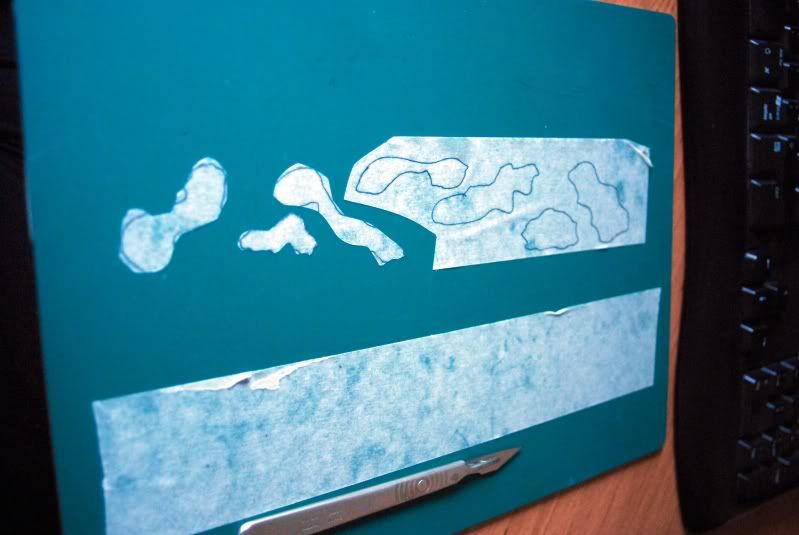
Okay in order to replicate camo, what I do is take some wide masking tape, and roll some out onto my smallest cutting mat (you can use frisk for this but it tends to be more adhesive) I then cut random camo-style shapes in the tape and peel away the excess leaving me with this
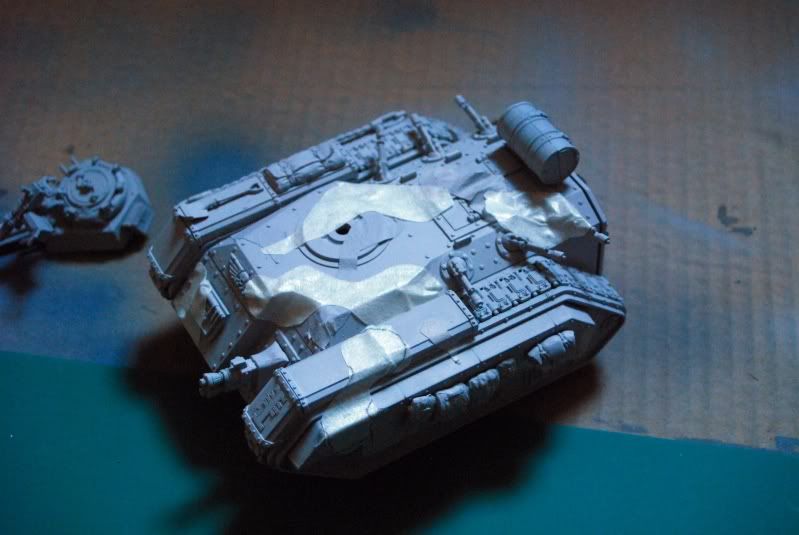
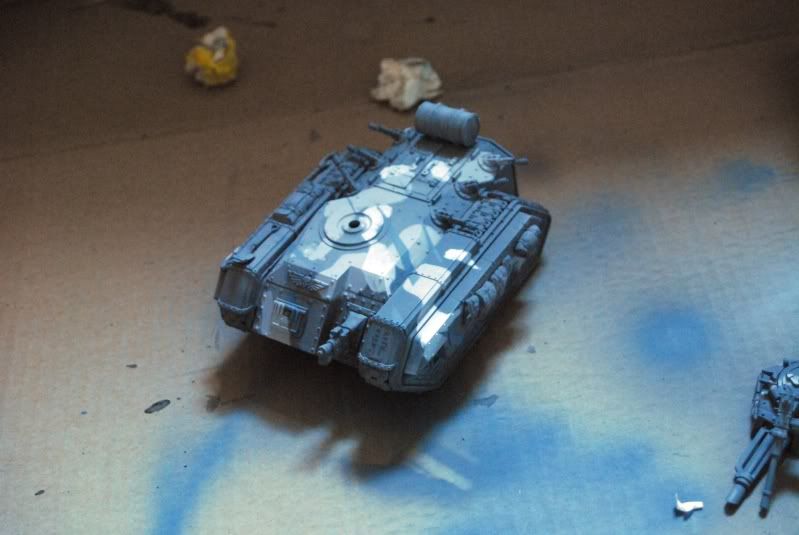
once the white is dry I place several of the camo shapes on the model. this will ensure that whatever else I do, the model now has those areas in white. I'm sparing with this as I want the white to be an accent colour.
with the masks in place I spray the light grey.
and once this dries I apply more masks, then spray the darker grey.
I let all this dry then carefully remove the masks.
then I swear my ass off because the new masking tape I have has bled really badly. that means brush touch ups, which never look good, ah well lesson learned, and here it is with three colours on.
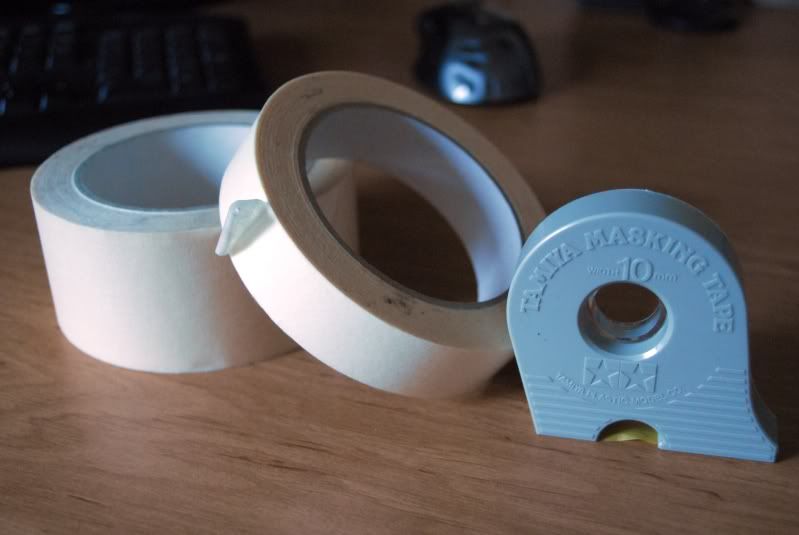
At this point in some schemes I might want to throw in black, but on this model I decided to avoid it and go for an intermediate blue instead. for this i masked off specific strips and sprayed them, being careful not to overspray and using my trusty old narrow masking tape. I have three kinds, of varying thicknesses, and all low "tack", meaniing they arent very sticky and shouldnt lift previous coats of paint, tamaya make the best, but most expensive tape. frisk can also be used, which is an adhesive film, the problem with this though is that it's non-porous so if you spray a lot, it can bead and run.
enough pictures of tape. Here it is with all four colours on!
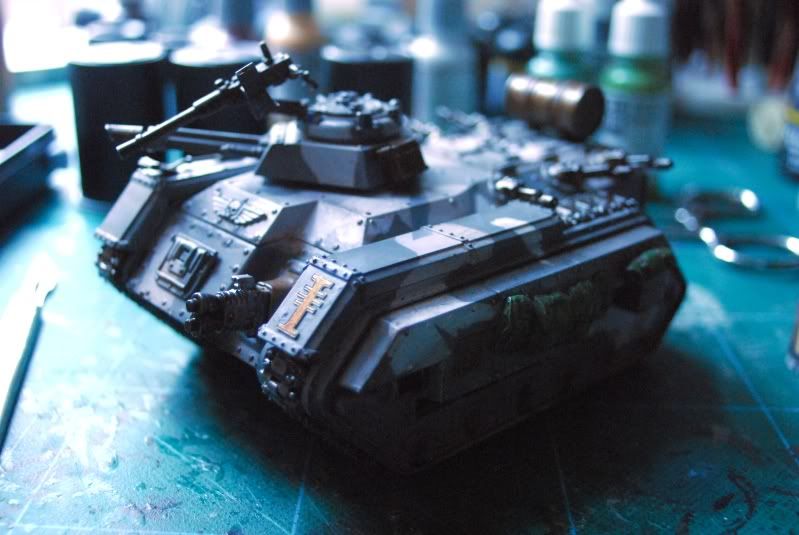
Next stage is to weather the paint, and put on the details.
first thin i do is give the armour edges and raides areas like rivets a very lght defining drybrush of my lightest paint colour, the apply scratches and chips with a sponge using black and bestial brown mixed. I didnt photgraph those as I was a bit carried away by this point :)
I absolutely swear by two particular MiG products for the remainder of the weathering.
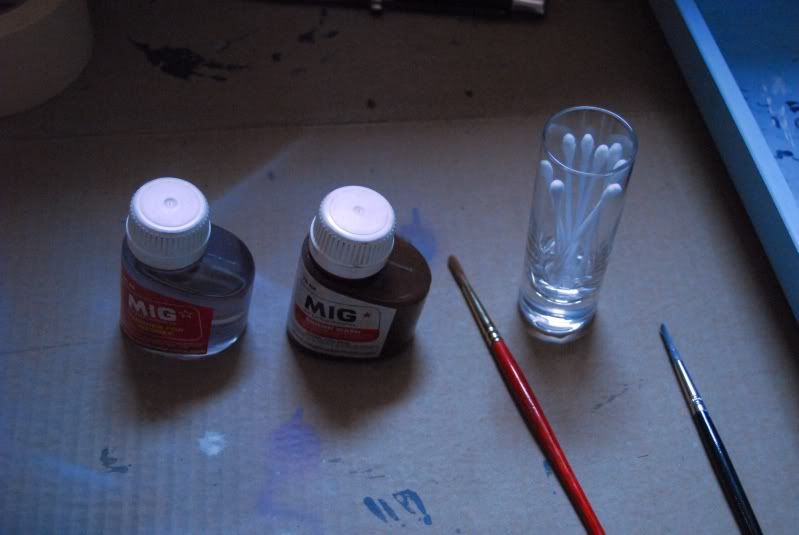
the mig solvent based washes are fantastic to use with acrylic paints, they go on well, suck themselves into recesses and best of all excess can be removed from upper surfaces with a q-tip dipped in thinners. wicked.

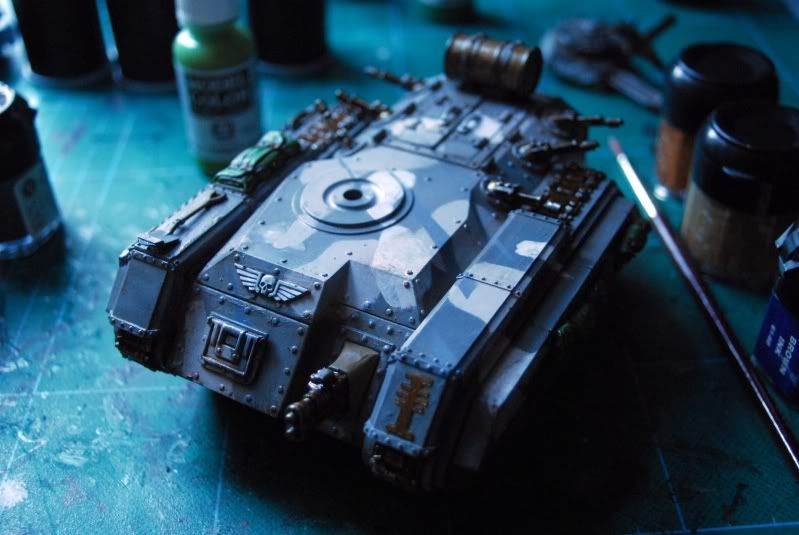
that's after a going over with the wash, apologies for the poor photographs, next time i'll pop them in my lightbox at each stage.
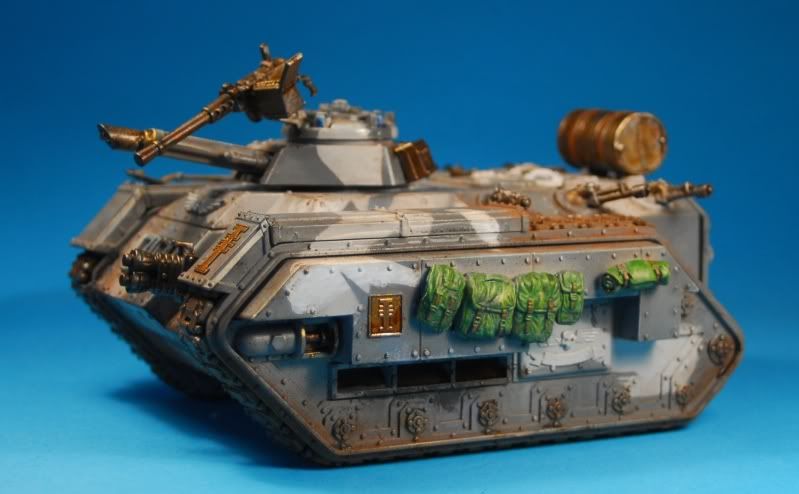
once this dries I start painting things like the bags, track, guns etc. most of the metal gets a bestial brown basecoat with a wash of brown ink and klear, finished with a drybrush of boltgun and a fingerfull of pencil lead for the final shine. the bags are medim olive and light olive with a badab wash.

Once this all dries I started to pick out the badges and other details like bullets in vallejo bronze and again wash with brown ink.
 The final weathering is done with mig weathering powders and is just liberally applied to the tracks everywhere dust would have gathered. I wanted dried dust on this model, had I been aiming for mud I would have used thinners with the powders.
and after all that, I have this
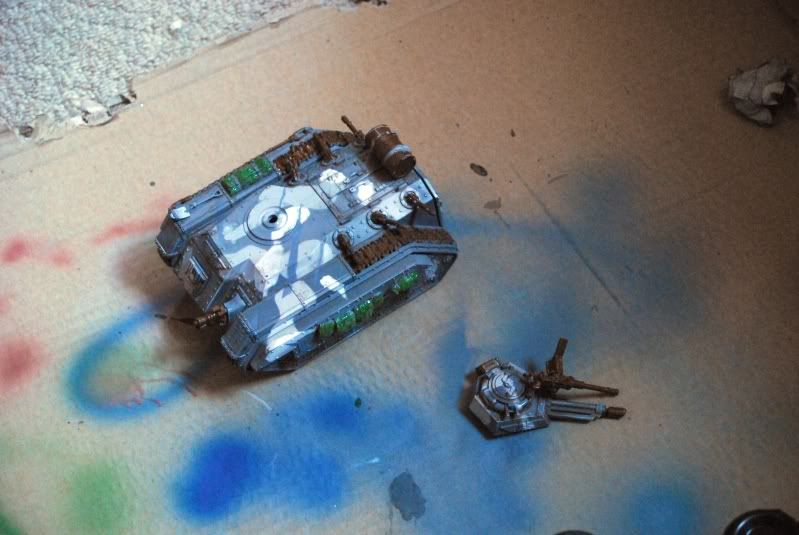
 Hopefully you can see most of what I'm talking about in this better picture, and those in the post below.
What I've learned - my new masking tape is crap. I should have put less of the detail on the model untill I'd sprayed the camo, my camera needs telling the light has changed and my lightbox is better for pictures :)
Hopefully you've learned something too, and if i decide to do anymore step-by-steps I promise to do better.
thanks for reading, comments welcome as always.
I must say, that is a very effective method!!
ReplyDeleteI'm about to start on my IG mech soon and would probably borrow some of your tips!
Good work.
That looks really sweet! I've yet to paint my tanks, so this article is really helpful. One question though, what kind of weathering powder do you reccomend? I've never used it (or even heard of it) and it sounds really useful!
ReplyDeleteGreat article!
Thanks guys, glad this might be of use to someone.
ReplyDeleteas for weathering powders, you can use shaved chalk pastels (not oil) and if you're like me you'll already have those. nowadays I use MiG pigments though, they come in a range of colours are nicely adhesive and a pot will last you a very long time :)
Thanks! I think i'll go with the MiG, seems the more reliable option.
ReplyDeleteAs an addendum, It's just been brought to my attention that vallejo, whose paints I use, have just launched a range of pigments too.
ReplyDeleteI havent tried them yet, but I've ordered one for a looksee.