
So here we are, another update tonight, as promised. This is my first time working with brownstuff, but dont let that put you off, what I'm showing here I've done many times with Greenstuff, the change to brown Is for my own experimentation and I'll let you know how I feel about it once it's cured :)
So, first things first, I'm going to make some teeth and set them aside to cure for later.
This couldnt be easier, all you need to do is make a fine, sharp point just like the end of a sausage-

Then snip it off with a lubed scalpel.

Here's a collection set aside to cure, some have had a slight bend added, others are straight. and yes, that is a CD, I use failed-to-burn disks as everything from pallettes to bases for craters :)

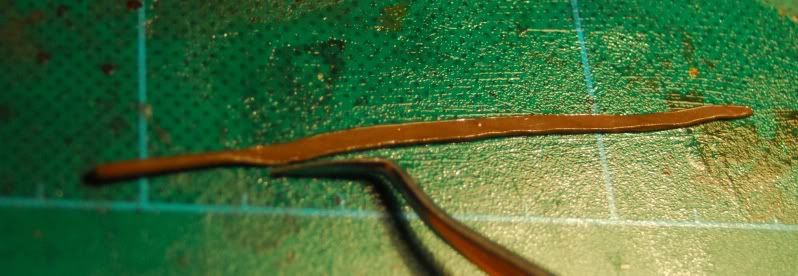
Next job is a tad more complex, still here? good. :) Lets talk about chains....
still here? :)
First thing we need is a - yeah you guessed it, sausage of stuff.

Which I proceed to flatten gently with one of the sculpting tools I use.

I make sure to square it up from time to time to keep the now squarish section. youll get used to doing this often as you make these chains.
Next I "nibble" a series of impressions along the length, both sides, with a single press of my tool.
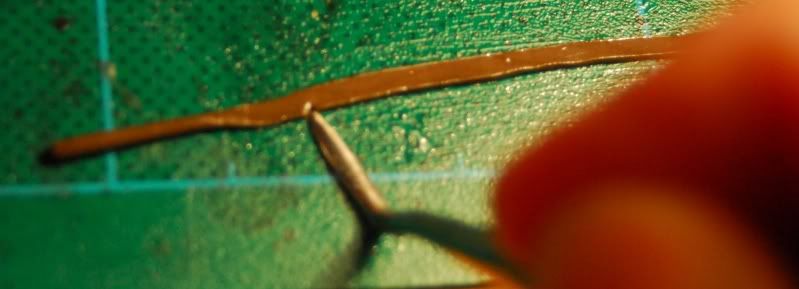
Repeating this along both sides, trying to keep the spacing even.

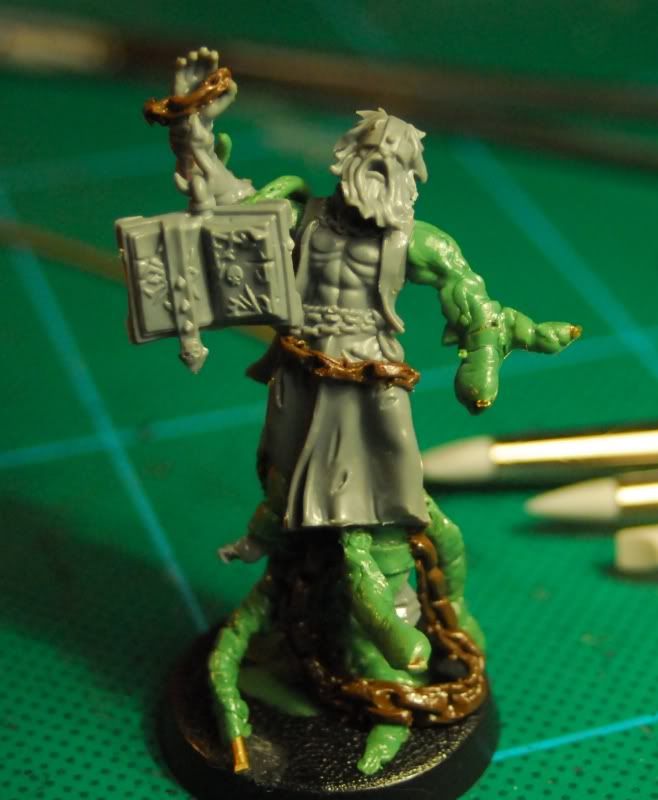
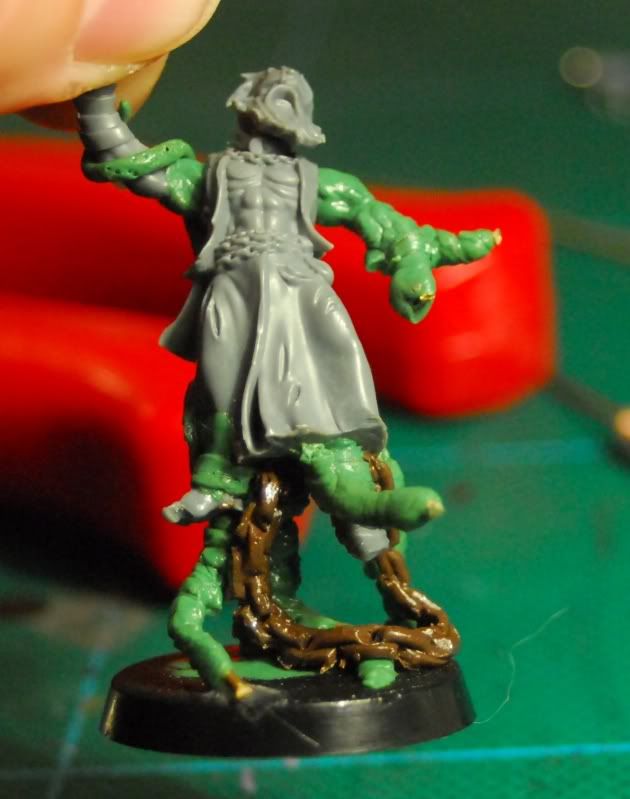
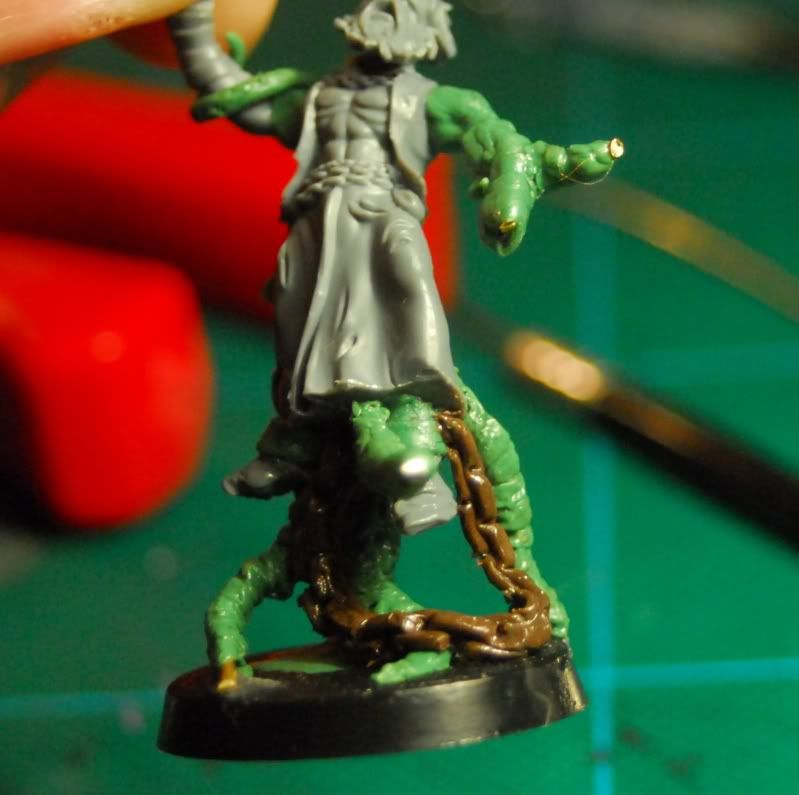
So that's where he's at now. Thanks for staying with these those of you who are still here, tomorrow I hope to add a few mouths to some of his body parts, :)
Eventually we arrive here. at this stage I bore a small hole in the middle of each link, shoring up the sides as I go if neccecary.
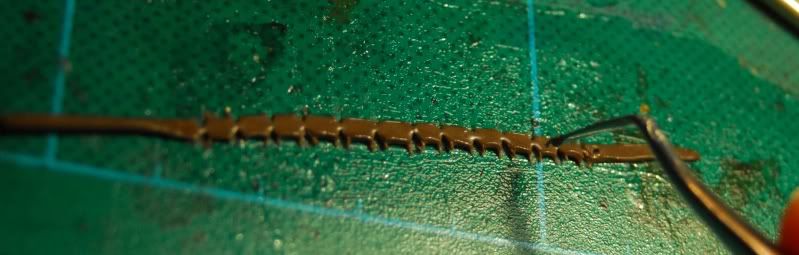
Giving us this.
Then I take another slightly thinner sausage of stuff.

And lay it on top.


Giving us this.
Then I take another slightly thinner sausage of stuff.
And lay it on top.
Then Proceed to press down in each of my already made depressions.
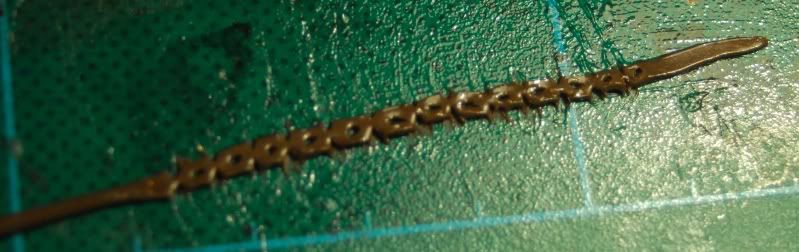
The end result is this:
Which gets a final flattening of the top links, before being called ready.
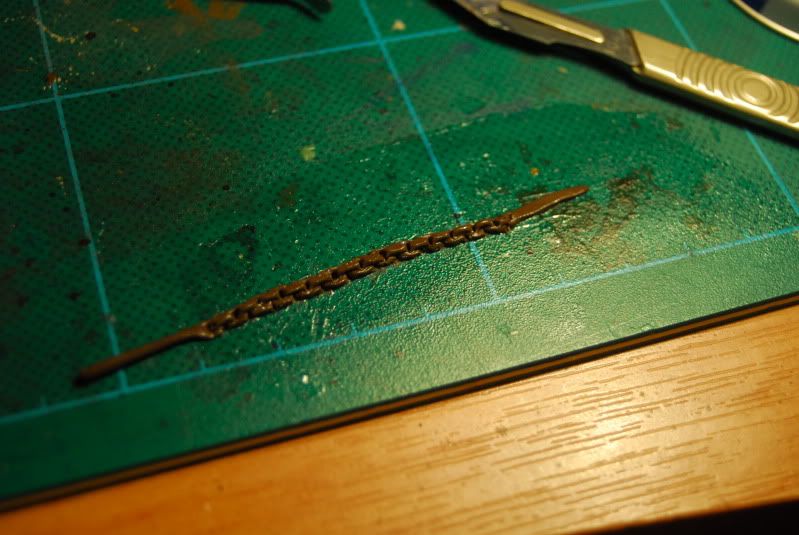
Once the chain is complete it can be applied to the model, securing it at suitable points.
I then go on to make a few more chains of various sizes and raid the bits box for something suitably chaosy to add something to the model.
So that's where he's at now. Thanks for staying with these those of you who are still here, tomorrow I hope to add a few mouths to some of his body parts, :)
Great stuff, I'm really enjoying reading these tutorials.
ReplyDeleteI don´t know, how these flagellant guys are in Empire WFB army, but the figures itself find so many uses.
ReplyDeleteI agree - the flagellant models are just chock full of really great bits.
ReplyDeleteGreat job on the greenstuff tutorials. I have seen one or two on making chains before but yours is the most straightforward that I have seen.
These tutorials are great! I have a feeling I know where the mouths will go, and I have a feeling it will look awesome.
ReplyDeleteThose sculpted chains are AWWWWWWESOME!!!! I don't know have the slightest inkling of how to sculpt at all, but what I do know is that I can bloody well appreciate the delicate skills (not to mention the creativity) you've displayed in your GS tutorials. Thumbs up.
ReplyDeleteGreat looking chains! Wouldn't have thought of sculpting them that way, I may have to try it out.
ReplyDeleteWow, thanks for the support everyone. It's been a great motivator for me doingthese, and hopefully I'll get this guy finished either tonight or tomorrow.
ReplyDeleteI've got to shout out again to Ron at FTW as this whole ting was done becuase he sent me an email asking the FTW community to dig out some GS tips for a feature he's running next week, well that gave me the impetus to do this guy and document it for anyone who cares to read it.
harreh - Youre probarbly right, and it will depend on if I can get them right or not :)
Really nice work and a great tutorial too. Thanks, mate!
ReplyDelete- Drax.
Awesome tutorial. Thanks for that one! I never would have known where to start if I wanted to sculpt chains for my Warriors but you're method and your tutorial is really concise and I might well give it a go on one of my minis I have planned!
ReplyDeleteVery excellent tutorial. I just used it so I could sculp chain for the first time on my spiteful sheild magic Token.
ReplyDeleteI saw a similar tutorial for chains somewhere before--I think maybe it was a Dark Eldar page? Very cool, and a nice finished product, but is it really cheaper than buying pre-made chain from a crafting store?
ReplyDeletemaybe, but pre-made chain never looks right to me on 40k models, bcause of the "heroic" scale, and the fact that the GW team always sculpt chain.. this has always seemed more "in keeping" to me.
ReplyDeletebesides, getting chain to stick... this might be easier :)
Good point, I always get glue everywhere trying to get chain to stick.
ReplyDelete